
Vital signs
Benchmarks for the vital signs
- Palpate the radial pulse at the wrist
- Count respirations
- Measure blood pressure by auscultation
- Interpret adult vital signs:
- Normal pulse is 60-100 bpm
- Normal respiratory rate is 8-20 breaths per minute
- Normal blood pressure is 120/80 mm Hg
- < 120/80 mmHg is defined as normal blood pressure
- 120-129 / 80 mmHg is defined as pre-hypertension
- ≥ 130 / 80 mmHg is now defined as hypertension (older definitions used higher values)
Almost every patient encounter begins with vital signs, which are often performed by a medical assistant or a nurse. You should know how to measure pulse, blood pressure and respiratory rate yourself so you can identify and confirm abnormal findings. You may also check vitals yourself in service learning or on international rotations. Temperature, weight, and oxygen saturation are also checked in some settings.
Immersion: Video
Immersion. Pulse and respiratory rate
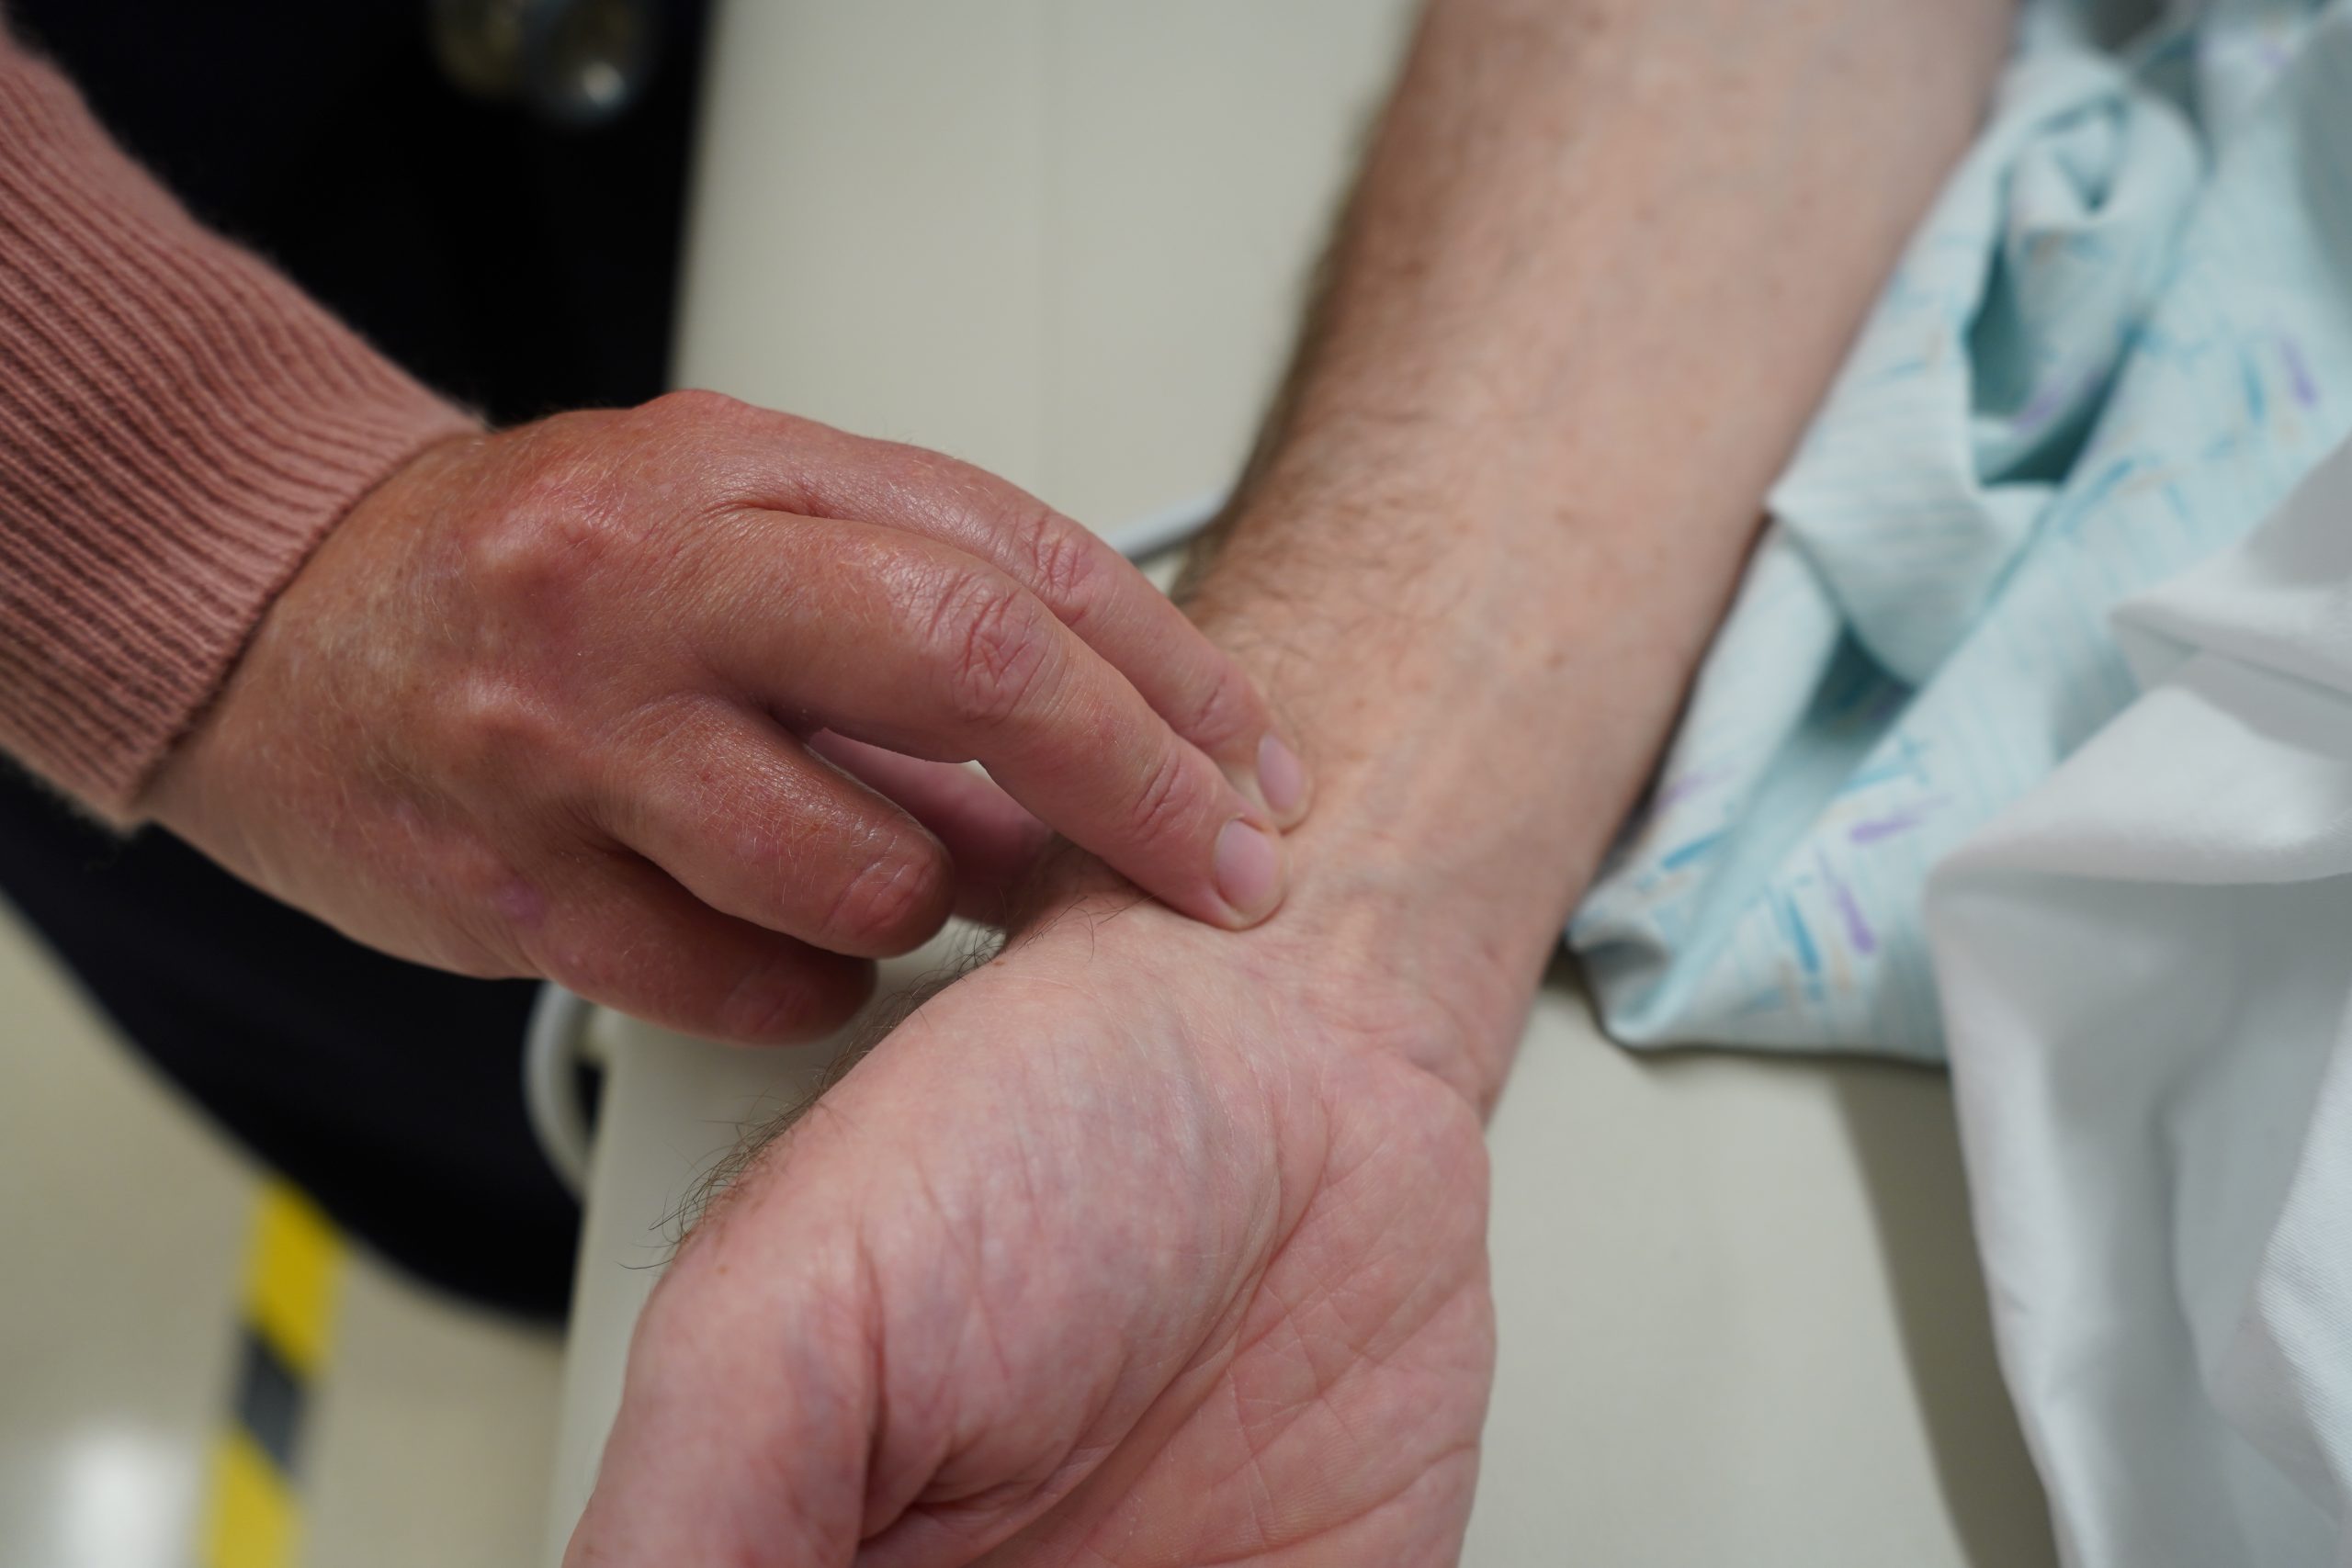
With your first two fingers placed on the radial artery, just lateral to the tendons of the ventral wrist, count the beats for 15 seconds and multiply by four. If the pulse is irregular, it is more accurate to count for 30 seconds and multiply by two. The normal adult pulse is 60-100 bpm.
Continue to palpate the radial pulse and count respirations for 30 seconds, discreetly observing the rise and fall of the chest or movement of the abdomen. If the patient realizes you are counting breaths, their awareness of breathing may cause them to speed up or slow down. The normal adult respiratory rate is 8-20 breaths per minute.
Immersion. Blood pressure
Although 45% of American adults have hypertension, inaccurate measurements often lead to missed diagnosis and under-treatment. Thomas Friedman, the former director of the Centers for Disease Control, estimated that improving blood pressure control could save more lives than any other single clinical intervention. You will complete the Blood Pressure Measurement Essentials module to ensure you learn this critical skill. Even if you have learned to measure BP before, you are likely to learn something new from this module. The steps in measurement are summarized below for review.
PREPARATION: The patient should
- Avoid exercise, eating, caffeine and tobacco for 30″ prior to measurement
- Empty the bladder if full
- Rest for 5 minutes before blood pressure is measured.
POSITIONING:
- The back should be supported
- The legs should be uncrossed and feet should be on the floor
- The upper arm should be supported at heart level
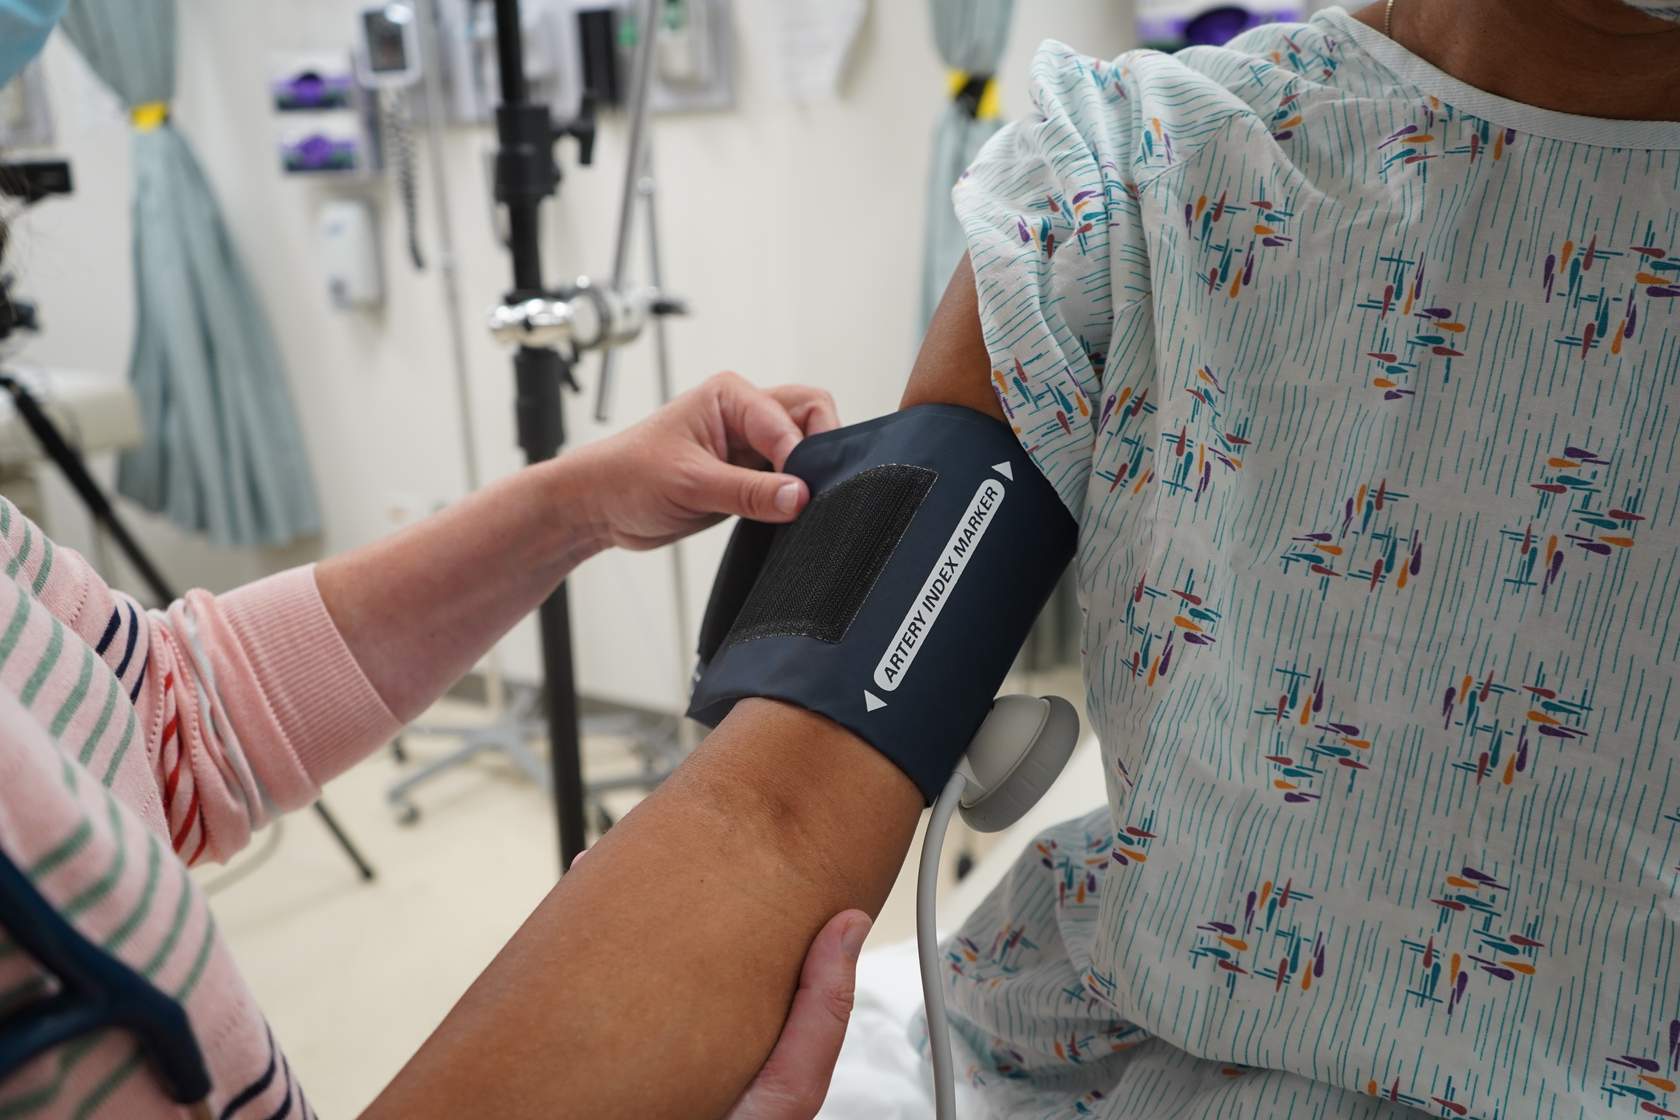
PLACING THE CUFF:
- Choose a cuff of the appropriate size. The bladder of the cuff should encircle 80% of the upper arm.
- Place the cuff 2.5 cm above the antecubital crease, with the index marker over the brachial artery
- Wrap the cuff snugly around the arm with
MEASURE BP
- Neither you nor the patient should talk during measurement
- Place the stethoscope between the lower edge of the cuff and the antecubital fossa
- Inflate the cuff to 200 mm Hg or until the radial pulse goes away
- Slowly decrease pressure in the cuff at a rate of 2 mm Hg per second, listening for Korotkoff sounds, noting when they are first heard (systolic blood pressure) and when they go away (diastolic blood pressure)
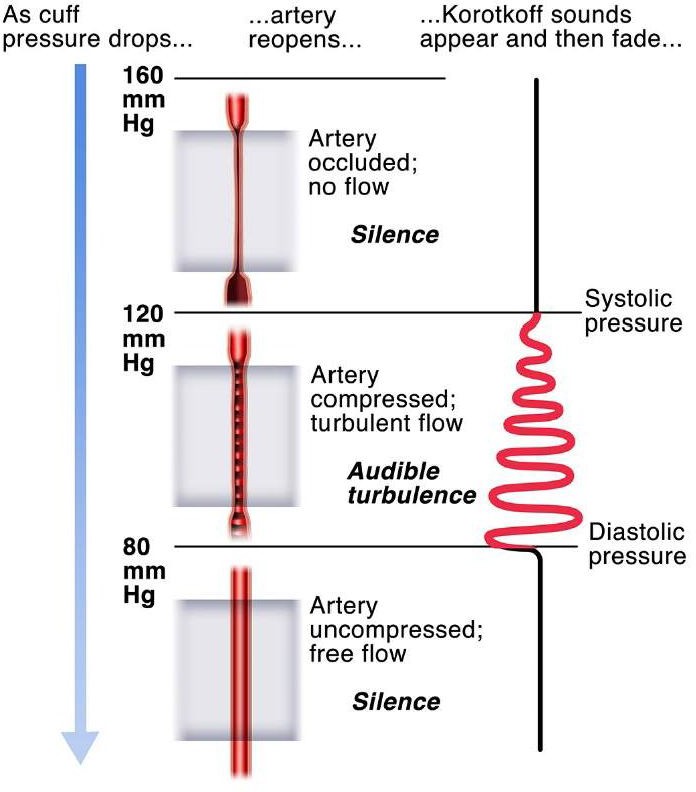 Korotkoff sounds are low-pitched sounds made by blood flowing through a partially compressed brachial artery. When the pressure in the blood pressure cuff is high enough to completely occlude the artery, blood flow stops and no sound is heard at all. As the cuff is deflated and the artery partially re-opens, Korotkoff sounds become audible. As the pressure in the cuff falls to the point that blood flows freely, Korotkoff sounds go away.
Systolic blood pressure is defined as the point at which Korotkoff sounds first become audible and diastolic blood pressure as the point at which they go away. Classic physical exam texts describe five different phases of Korotkoff sounds; this is more complicated than necessary for Immersion.
In this example, the systolic blood pressure is 120 mm Hg and diastolic BP is 80 mm Hg.
Sample documentation
Blood Pressure, 122/78; Pulse, 80; Respiratory rate, 16
Clinical: Pediatric Vital Signs
Vital signs in children vary substantially with age. A respiratory rate of 60 breaths per minute and a pulse of 170 is perfectly normal in an infant 0-3 months. For reference, you can find normal ranges for each age group on UptoDate (NetID login required):
