
11 Juki Sewing Machine
General Technique Tips
Instructions on 1) Inserting and threading the needle, 2) Drawing up the bobbin thread, 3) Pedal operation, 4) Changing and threading the bobbin case, 5) Stitch length regulation, and 6) Reverse sewing.
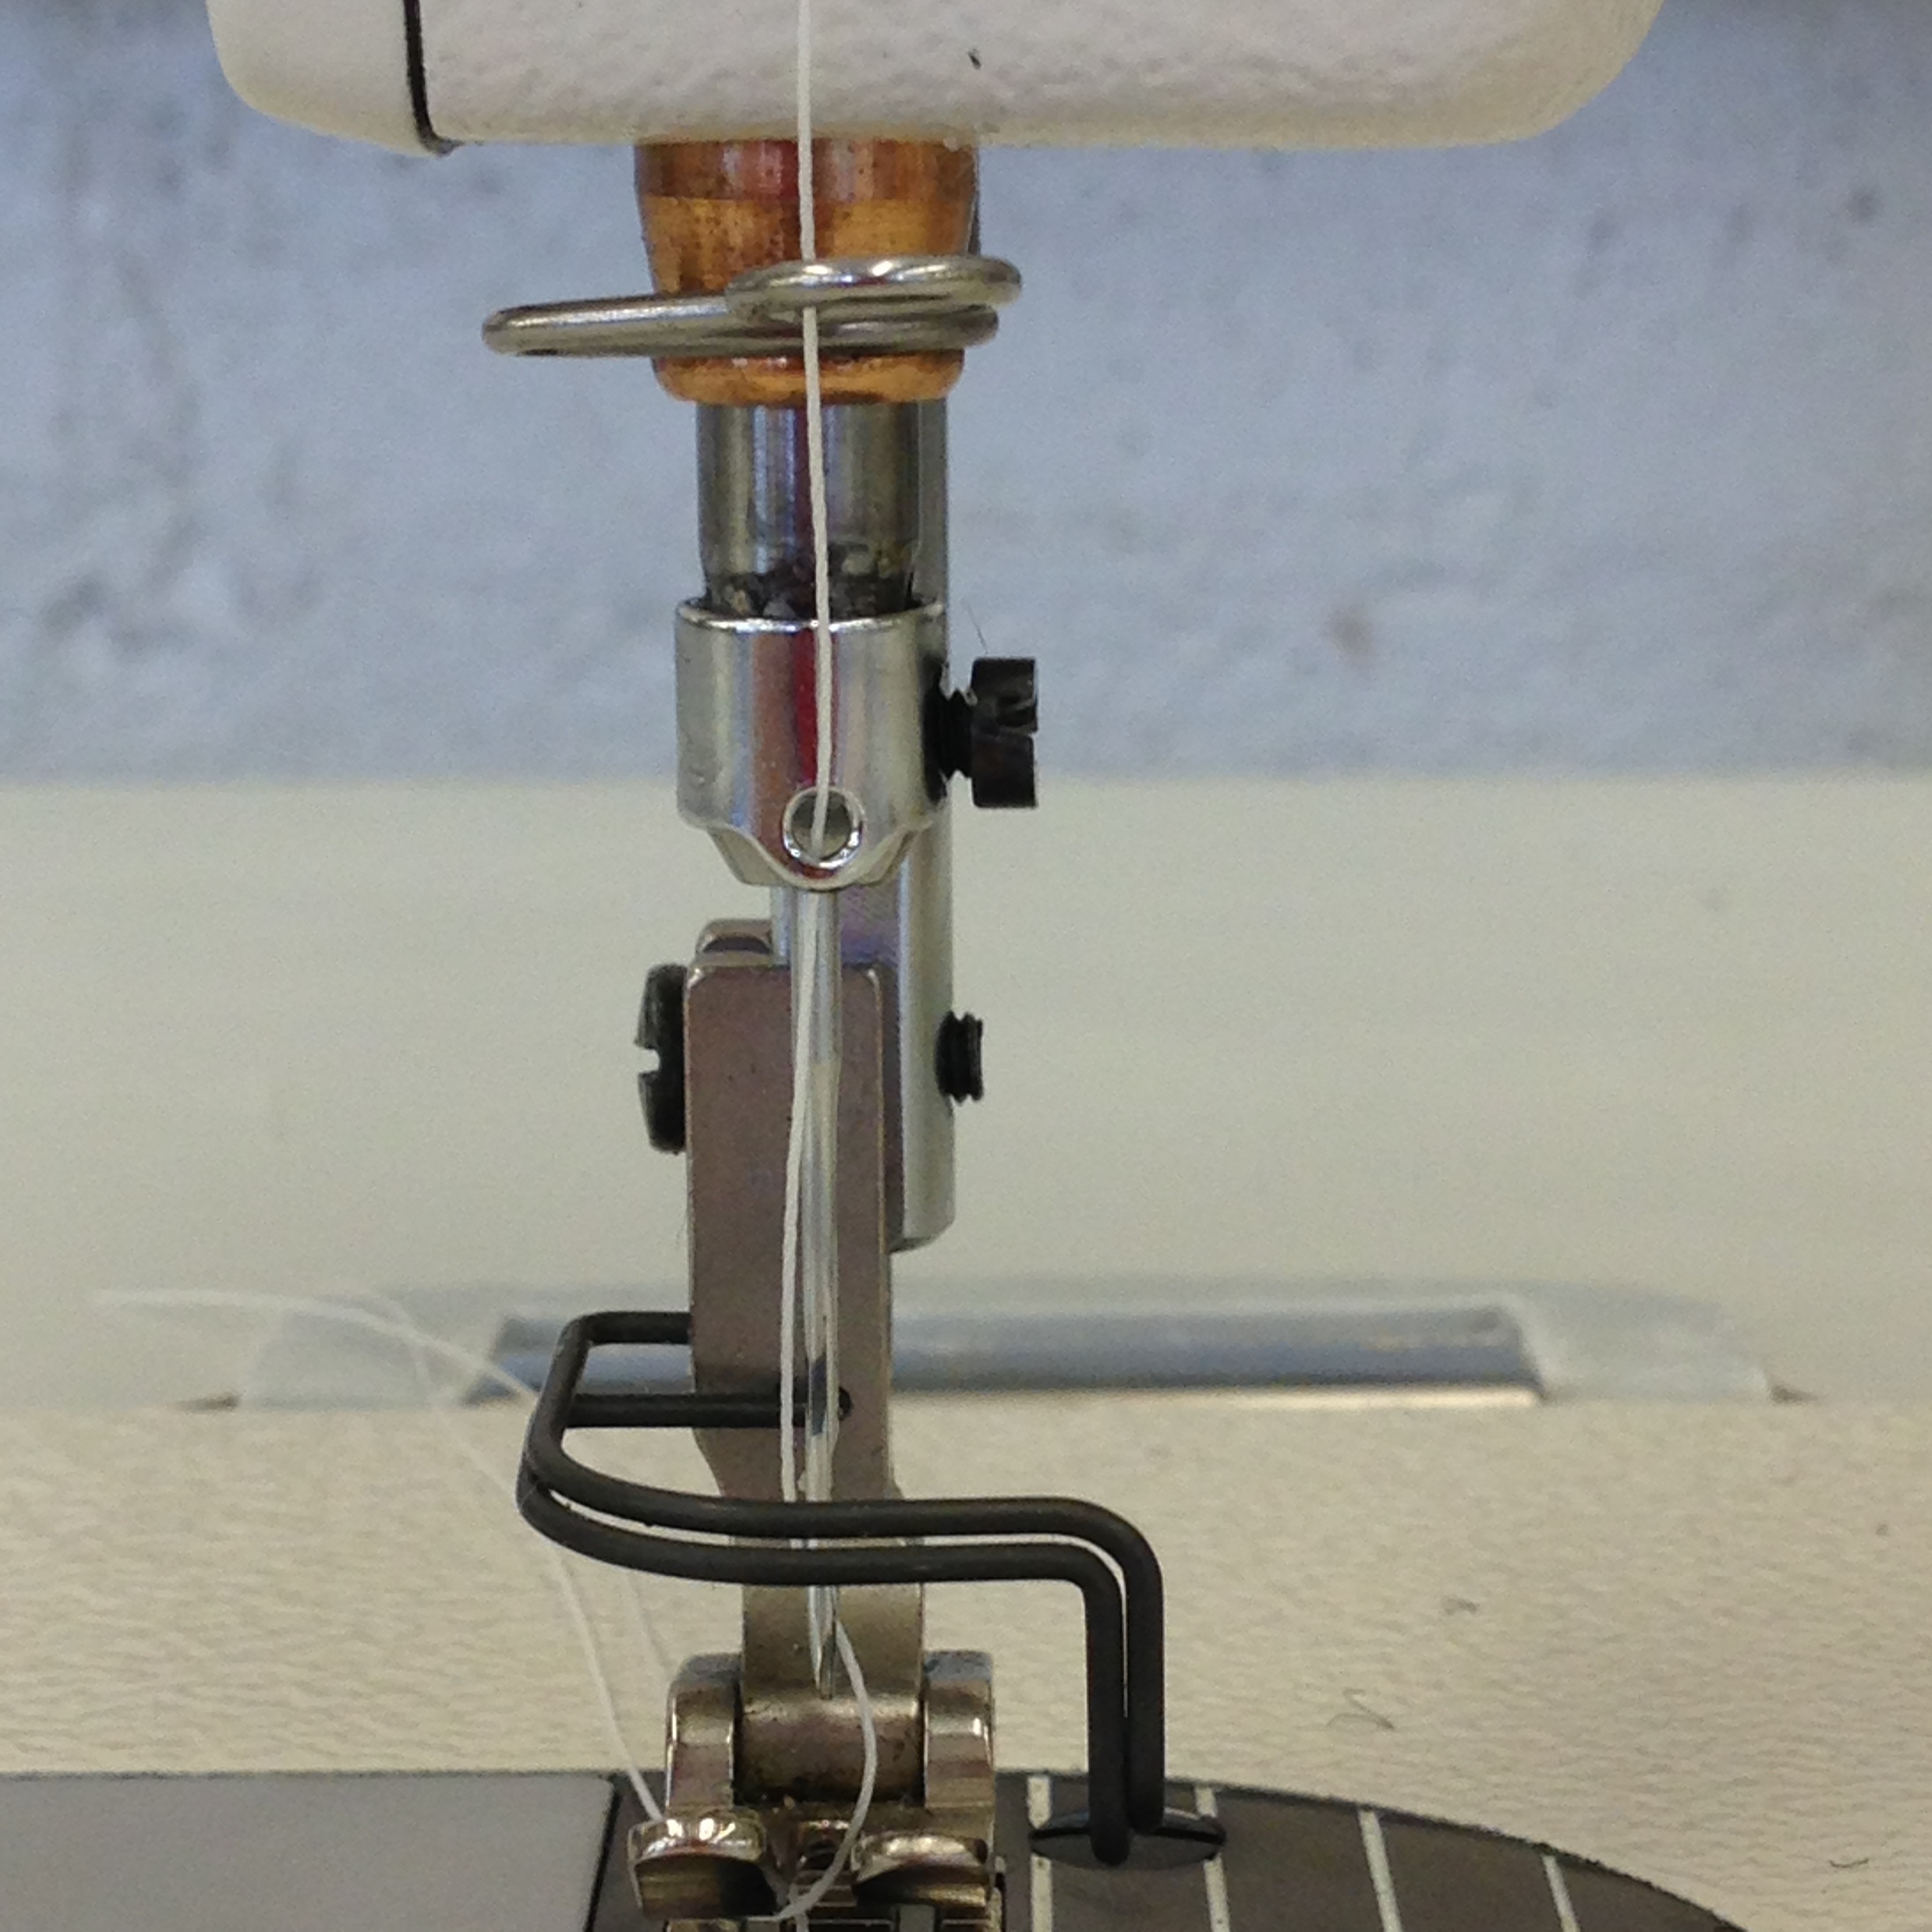
1) Inserting and threading the needle
The needle size and needlepoint style are dependent on the material. The needles are found in the drawer of the sewing machine. Each machine has it’s own style and size of needle.
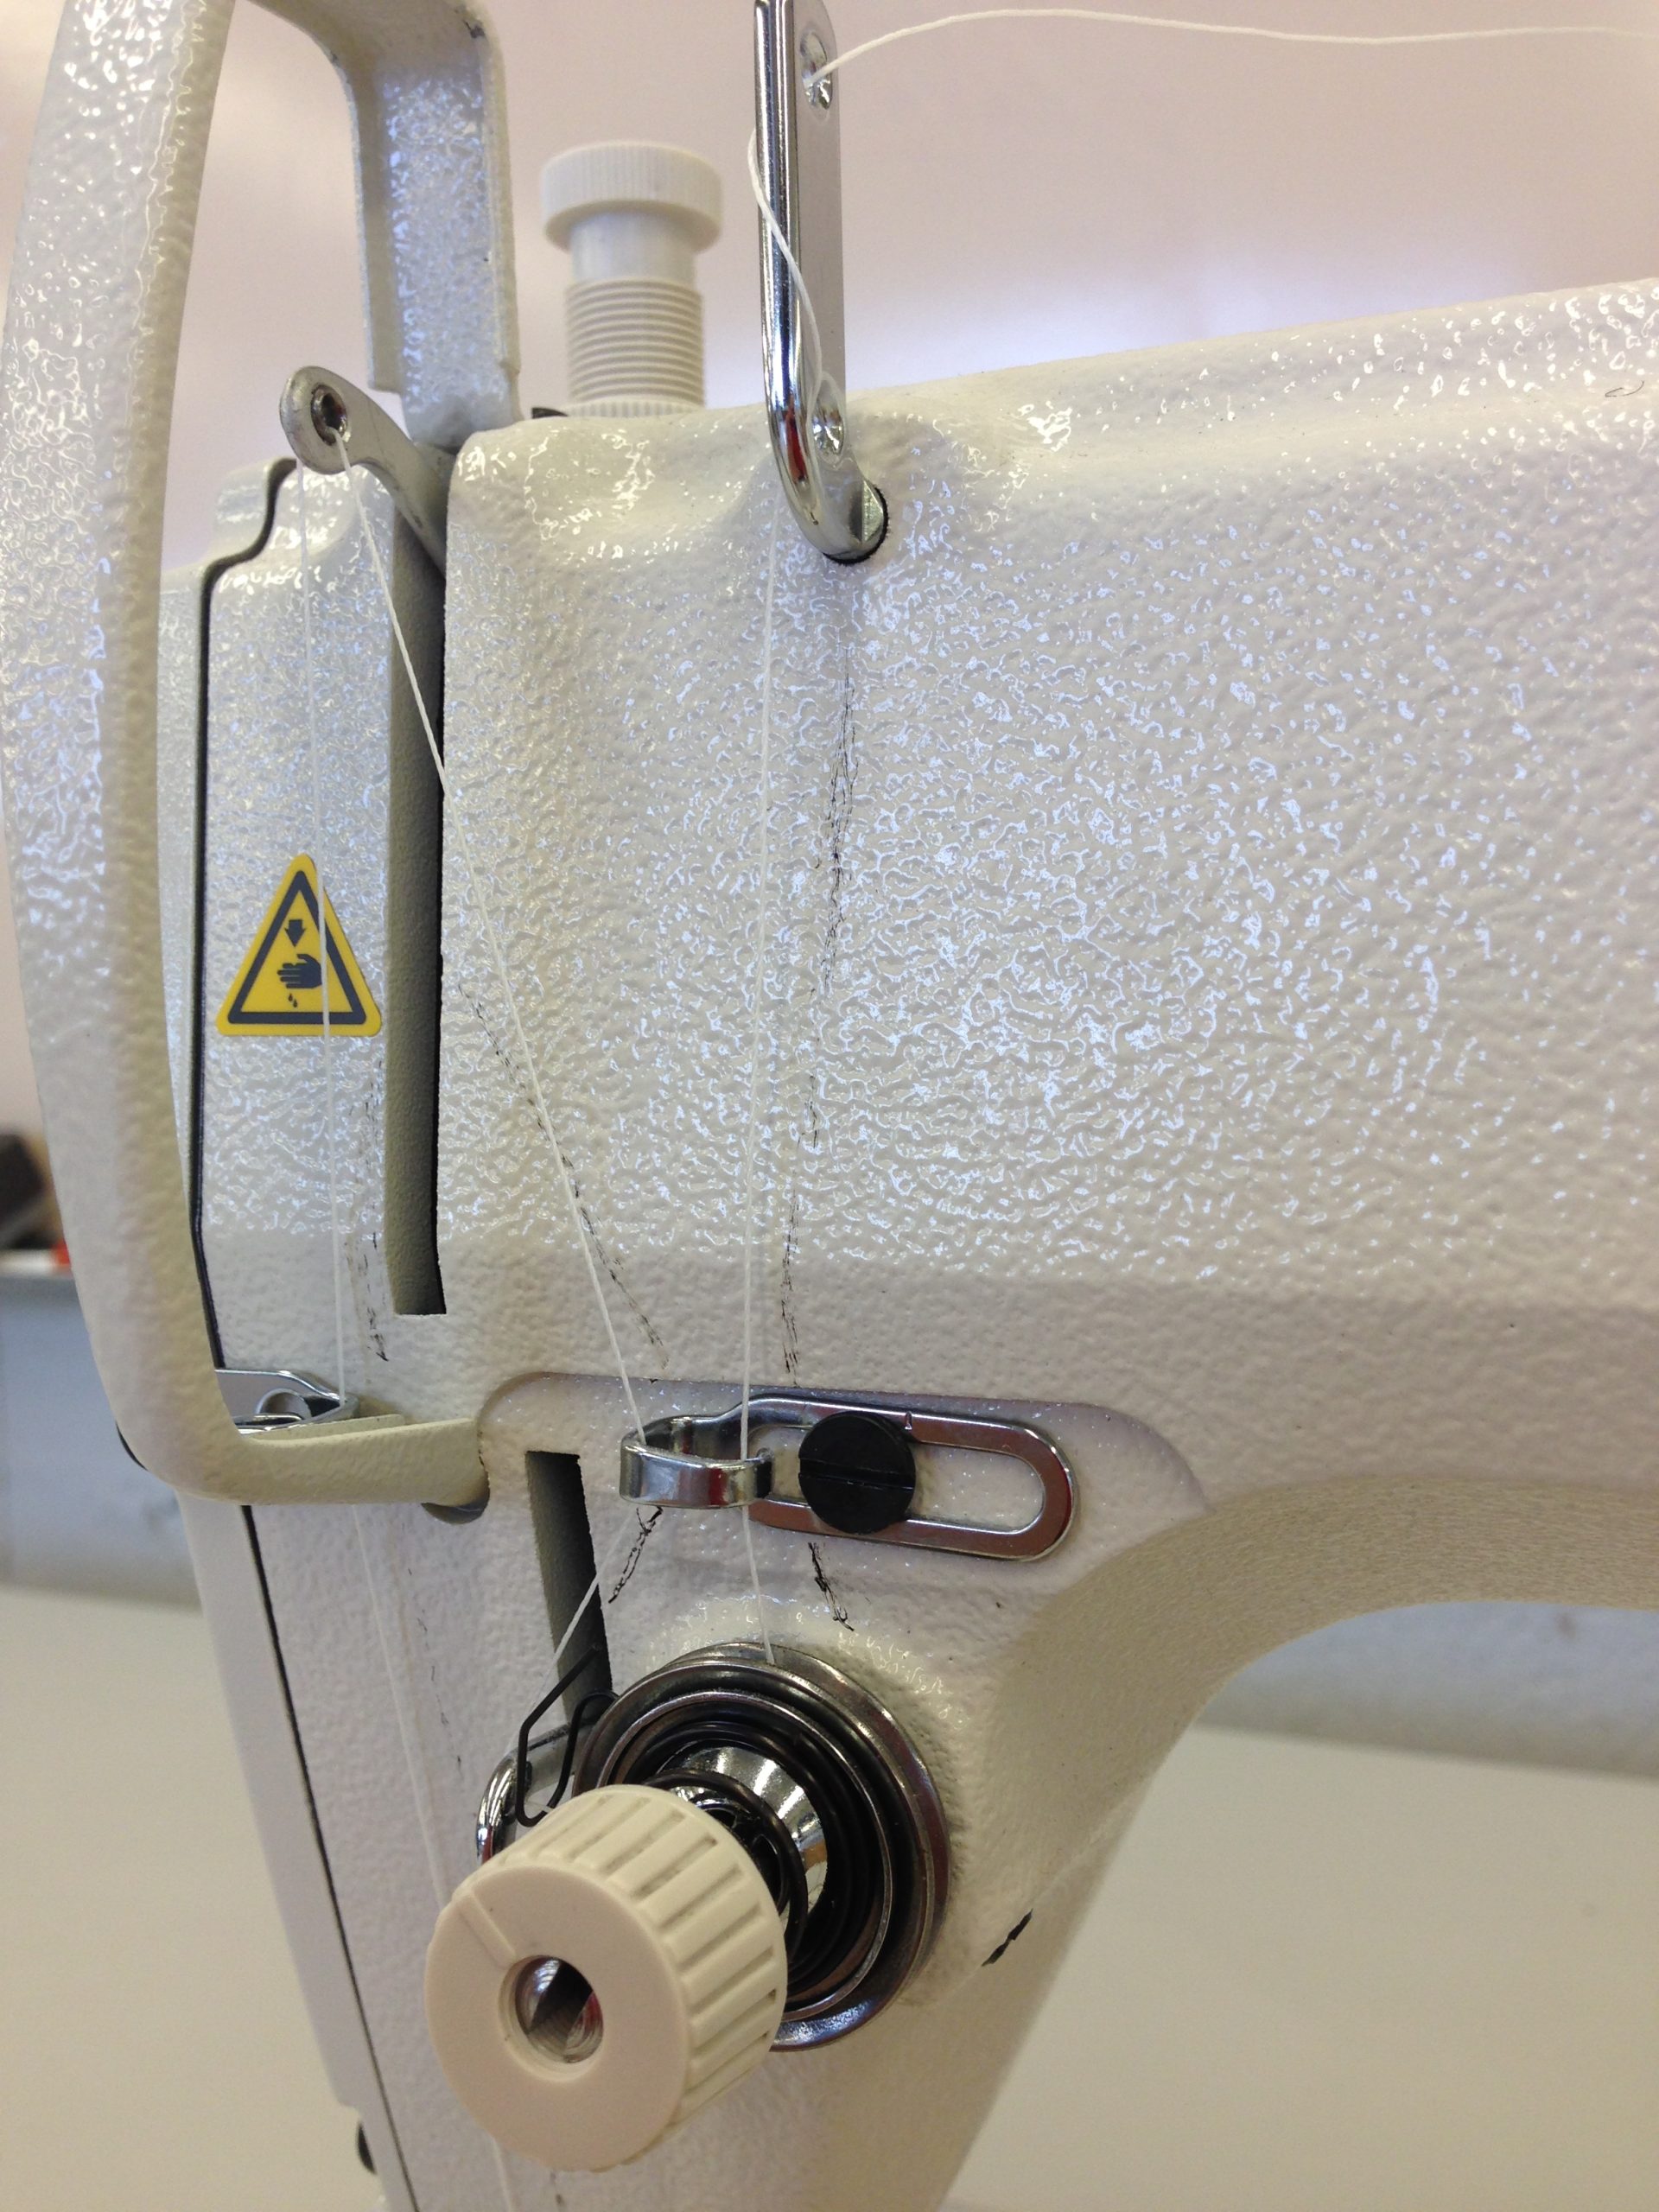
Bring the needle bar to the highest point, loosen needle set screw (A) then insert the needle and push it up as far as it will go.
Make sure its long groove faces toward the left. This groove allows the thread to enter the material. Both the Singer and Pfaff are loaded this way, but notice that other machines may have this groove facing a different direction.
Tighten the needle set screw securely.
2) Drawing up the bobbin thread
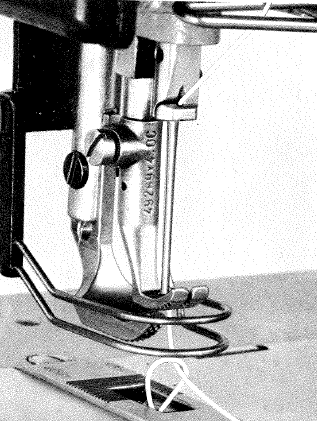
Hold the end of the needle thread allowing enough slack in the thread to be pulled into the needle hole. Turn the balance wheel in the sewing direction (downward) until the bobbin thread comes up through the needle hole in a loop. In the image to the right, notice the bobbin thread looped around the needle thread. Draw the bobbin thread out of the needle hole by pulling on the needle thread until you have the end of the bobbin thread. Lay both threads toward the back under the pressure foot.
3) Pedal operation
The pedal is sensitive to various pressures, similar to a gas pedal in a car. However, instead of having just a forward motion, it rocks forward and backward. There is a neutral position, forward position and a break. The neutral position is the resting position. To start the machine sewing forward, press the pedal forward.
To sew slowly, press the pedal slightly. To sew up to top speed, press the pedal forwards all the way.
To engage the break, rock the pedal backward by pushing your heel down.
4) Changing and threading the bobbin case
5) Stitch length regulation
6) Reverse sewing
7) Thread tension (for information only, please avoid altering the tension)
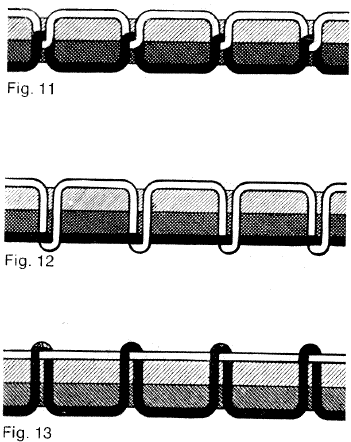
You might notice when sewing different types of materials that the top and bottom stitches are uneven. The tensions in both the needle and bobbin threads need to interlock evenly in the center of the material to set the stitches tightly. Figure 11 shows proper thread tension.
In Figure 12 you can see that the tension between the needle and bobbin threads are uneven. Here the upper tension is too loose, or lower tension too tight. Figure 13 shows the opposite problem, the upper tension is too tight or lower tension too loose.
To regulate the needle thread tension, turn the tension knob in the desired direction. When the regulating screw is turned clockwise, the pressure of the presser foot on the thread is increased. When the screw is turned counterclockwise, it is decreased.
***Please NEVER change the tension on the bobbin!