48 Vacuum Lamination Process
- Prepare the mold
- Mold – remove all sharp edges of mold. The pipe must have a hole in it above the sleeve assembly with clear airway to bottom of pipe. You may apply a parting agent such as cellulose acetate.
-

Vertical Fabricating Jig (VFJ) Gather Supplies
- Respirator
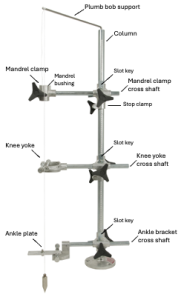
- Vertical Fabricating Jig
- VFJ collar
- PVA bags
- one open-ended and one closed-ended
- Towel
- Nylon hose to place over the smooth mold to ease fit of PVA
- Yates clamp
- Black tape
- Sharp scissors
- Fibers (layup)
- Nylon stockinette
- Felt – use for inner surface to allow room for grinding (if needed).
- Special instruction for use of carbon fiber: When cutting the carbon cloth, cut it under the hood. Vacuum up the carbon materials so that others do not stumble upon the particles.
-

Venturi vacuum pump Vacuum system
- Surgical tubing is the airhose for vacuum
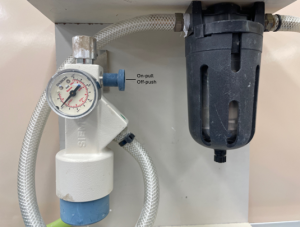
- Venturi vacuum pump
- Pop bottle (funnel)
- Parachute cord
- Baby powder
- Cups and tongue depressors for stirring
- Resin, catalyst and pigment– amount of resin depends on the numbers of layers of cloth and the size of your model.
- PVA Bags – soak in cold wet towel until pliable. Dry inside and out. Outside of bags leaves a matte finish and inside leaves a glossy finish.
- Set up model
- Place collar on pipe. Ensure the hole in pipe is accessible (about 3 cm space above the collar) to allow room to tape down the PVA bag. Allow about 2cm or more pipe to stick out the bottom side to allow space to attach the surgical tubing to the vacuum system.
- Place nylon over model
- Dry inside and outside of closed-ended PVA bag and place on the model
- Check vacuum
- Layup
- Felt around the brim
- Four layers of nylon stockinette
- Dry inside and outside of second PVA bag and place over the model. Check vacuum.
- Set up funnel and yates clamp. Put a little baby power on outside of PVA bag to reduce tackiness.
- Mix resin (300 gram) and mix in hardner very well. Then mix pigment.
- Pour resin into the funnel
- Allow air bubbles to float to the top. Remove yates clamp and let vacuum pull resin (at first).
- Squeeze reservoir. Do not let any air in. Let resin saturate the fibers
- Then use parachute cord to pull resin into prominences; vacuum will pull the resin into depressions. Press resin into the fibers and remove excess resin (avoid pooling)
- Do not push more resin than necessary. Resin should not flow past the end of the mold because if it gets to the vacuum hole it will stop the vacuum and ruin the lamination.
- Use yates clamp to secure resin from sitting on top of the mold.
- After resin has set, turn off the suction and remove the Yates clamp. Cut the PVA.
Things that can go wrong
- You want to reduce the chance of introducing air bubbles because this presents an area of weakness within the lamination. The strength of the lamination is in the fabric, not the resin. So don’t allow the resin to pool in the low areas, unless you want this area of thickness. Eg. It is ok to allow the resin to pool in the medial and lateral stabilizers of the self-suspension TR socket for more thickness and less of a sharp edge.
- Rip hole in the PVA bag and loose vacuum — tape the hole with black tape (have black tape handy)
- Over string the vacuum —
- Allow pooling of resin — resin heats up as it sets and may overheat the PVA bag to the point that it breaks.
- Lose vacuum
- Place a wick over the hole
- Do not allow resin to go beyond bottom of mold
- Clamp top of bag after pulling resin down – move as much of the resin above the yates clamp to avoid a big clump of resin at the distal end.
definition
Polyvinyl Alcohol.
PVA bags are used for lamination in P&O because, when damp, they stretch over various shapes and maintain an enclosed space. The materials stretches when damp and shrinks when heated. It can tear easily.
