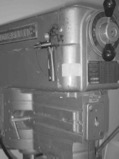
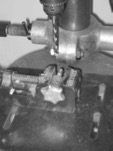
30 Drill Press
 PPE
PPE
- Use ear protection
- Use safety glasses
- Close toe shoes should be worn in all lab areas.
- Remove all loose outer clothing and confine long hair
General Technique Tips
- Preparation
- Place drill in spindle and use the chuck key to firmly tighten. Tighten all three chucks.
- Replace chuck key in holder after tightening bit in spindle.
- Use the vice for securing items. Use the drill stand to support item and backing when drilling through the material.
- Metal
- Center-punch metal items.
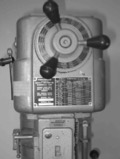
- Run drill at correct RPM for diameter of drill bit and material hardness. Adjust RPM with the drill press running. Drill speed scale is on the front of drill. Hard materials such as stainless steel use a slower speed. Cutting fluid may be necessary.
- Aluminum ~ 1200rpm
- Stainless steel ~ 800rpm
- The motor must be running when changing the speed to prevent the belt from coming off the wheel. This is like changing gears on a bicycle – the chain must be rotating on the chainring when changing gears or the chain is likely to slip off.
- Use lubricating oil with steel
- Plastic
- Do not center punch plastics.
- Do not use lubricating oil
- Align the drill bit with the mark.
- Apply pressure to the pilot feed lever, feed drill bit into metal fast enough to keep drill bit cutting at all times. If drilling steel, continue to apply lubricant to reduce friction and keep the bit cool.
- Just as the bit begins to cut through the material, ease up on the drilling pressure so the bit will not seize the material.
- Seizing causes the material to be grabbed by the bit, which will cause the material to revolve around the bit or will break the bit.
- Stop the drill press before removing any revolving material.
- After hole is drilled, release pilot feed lever slowly and allow the chuck to return to the starting position. Turn off power. Let the spindle stop of its own accord.
- Never try to stop the chuck with your hand.
- When work is removed from the vise be careful, the underside of the hole may have sharp burrs which will need to be filed or ground smooth.
- Remove drill bit and return it to the proper storage place. Do not leave tools, bits or excess pieces of stock on the drill press table.
- Use bench brush to clear scrap material from the drill platform. Never use your bare hand since many particles may be sharp.


- Never attempt to stop a revolving piece of work in the drill press by hand.
- Never allow any part of your body to touch the drill bit or any revolving part of the drill press while it is in motion.
- Never attempt to remove a drill bit from the chuck by engaging the power.
- All belts and pulleys must be guarded. If frayed belts or pulleys are observed, the press must be taken out of service and the belts or pulleys replaced.
- Stop the machine immediately if odd noise or excessive vibration occurs.
- Only properly sharpened drill bits and cutting tools in good condition should be used. Dull drill bits and chipped or broken cutting tools must be removed from service.
- Disconnect drill press from power source and follow lock out/tag out procedures for stationary presses or manufacturer’s instructions for table mounted/portable presses if making repairs or servicing. Lockout/tag out procedures require that only trained and authorized individuals may repair/modify equipment.
