Program and Source Media Folder
Annotating Program and Source Photos
Review All Annotation Tools
Before beginning annotation:
- Read through the annotation process completely. The process is outlined in this chapter.
- Review the Overview chapters: Bulk Annotating, Relating Assets, and Flagging Assets.
- Review the description templates.
- Ensure you are using the most up-to-date Multimedia Resource Glossary, and refer to it often.
- Review the handbook’s Overview section for more informaton about source media and general tips. Remember to relate and flag assets, as needed.
Select the Asset
Select the asset to view the photo.
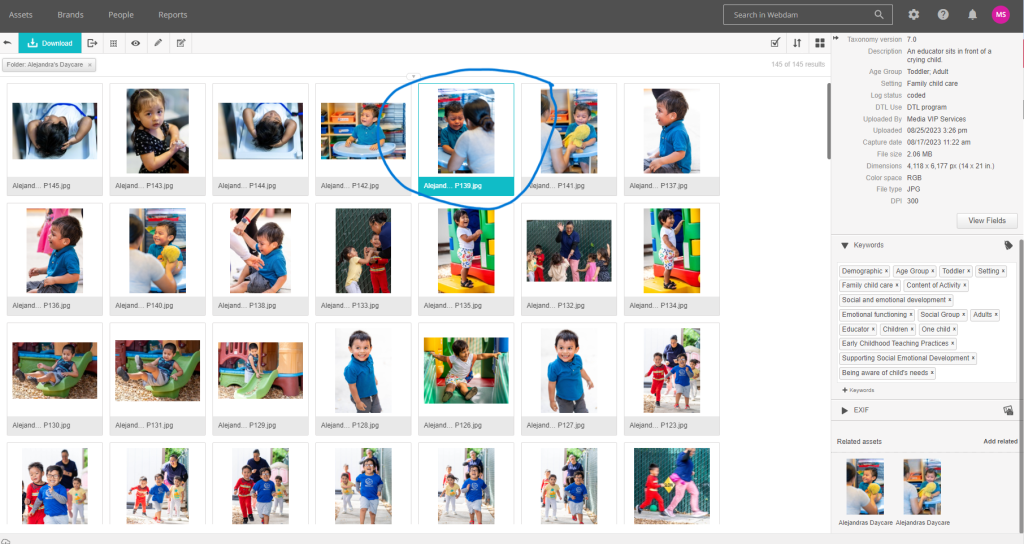
Add Keywords
- Review the Multimedia Resource Glossary.
- Select as many as apply and are relevant.
- Remember, keywords are used to search for specific content.
- Be careful to select keywords of teaching practices and content that are evident in the photo.
- Consider: Could this photo be used in products to illustrate the content or teaching practice you have tagged it with?
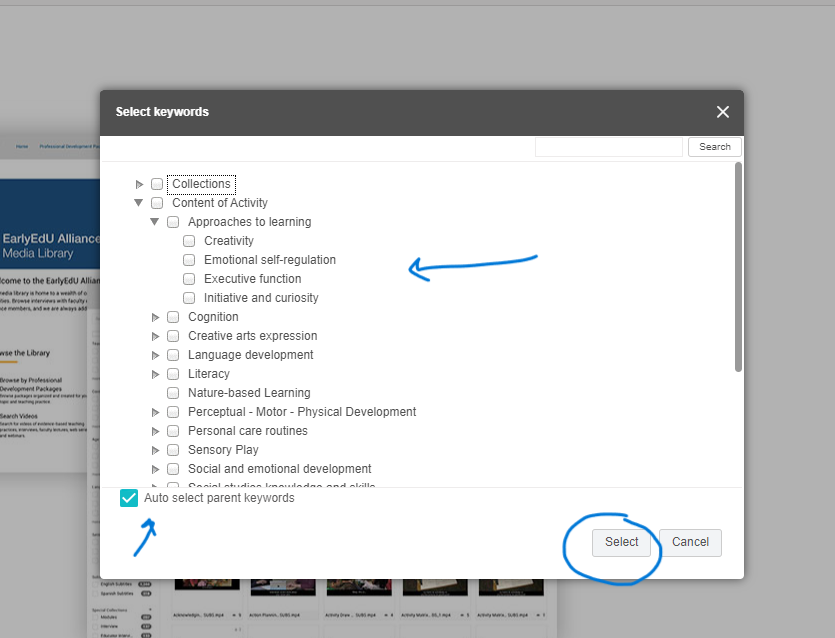
- Do not deselect “parent words” from keywords.
- Use only the Keyword drop-down choices. Do not write-in any keywords.
Directions:
Select the +Keyword feature at the bottom of the metadata fields on the right side of your device screen.
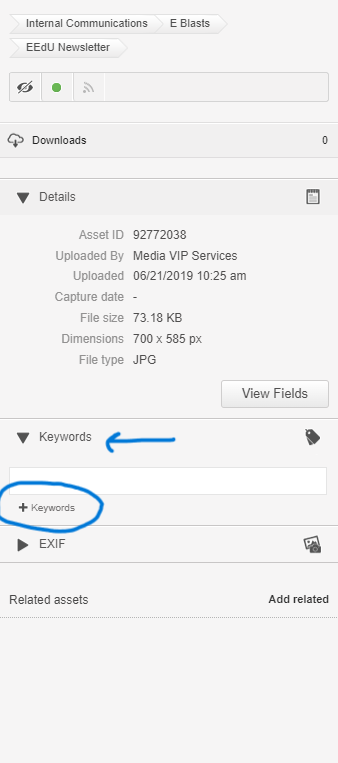
Use the drop down to select specific keywords. Refer to the Multilingual Resource Glossary. After selecting the keywords, click on the Select button.
Complete the Metadata Fields
First, open the metadata fields section by selecting “View Fields” at the bottom of the metadata section.
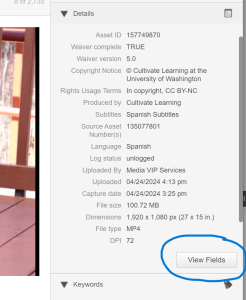
Refer to the Multimedia Resource Glossary, if needed. When you are finished adding iformation the the fields identified below, be sure to save your work by selecting the small check mark next to the open field.
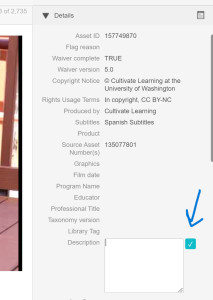
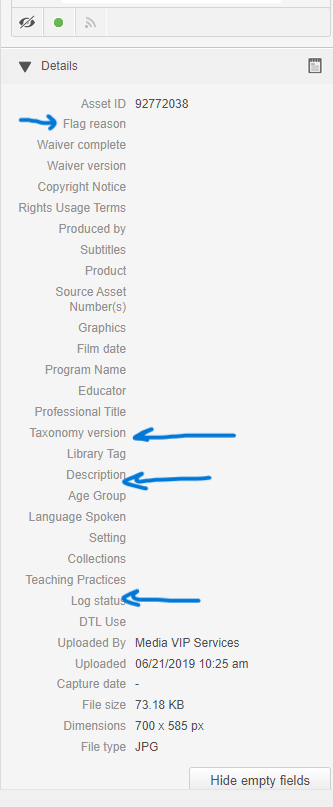
Add information to the following:
- Flag Reason: Review the Flagging Assets chapter.
- Taxonomy: Use the drop down menu. For current annotation, indicate the highest number available from the drop down.
- Description: Write a brief synopsis of the photo’s content.
- Refer to the Description Template section.
- Typically, a photo will have a brief description that reflects exactly what is seen in the photo.
- At times, you may be able to infer what is happening. Be cautious when inferring.
- For any Keyword that has a sub-keyword, please include the specific indicator in the description. For example:
-
- Individualized Teaching and Learning practices, please include the type of curriculum modification, embedded teaching, consequence, and prompt in the description as well as the keywords.
- Cognition (Content of Children’s Activity), please include the type of logic and reasoning, mathematical knowledge and skills, and science knowledge and skills in the description as well as the keywords.
-
- Log Status: Change status to coded.
- Note: If you are in the training phase as an annotator, you will change log status to “logged” so that it can be reviewed as part of your onoarding. Once this phase ends, you will change log status to “coded.”
Description Templates
Use the description field to describe what is happening in the photo. Briefly describe who is in the photo, when and where the action is, and how the content or teaching practice is most visible. Use these description templates to support your work.
- Educator and child are smiling at the camera, sitting close to each other.
- Two children are sitting at a writing table and writing letters. Only the backs of the children are seen. The writing table appears to be well stocked.
- A child is sitting on the floor near a puzzle. The child is pointing to their forehead as though thinking of a solution. The child is smiling.
- This is a photo of an art shelf in a classroom. The shelving is well-stocked, and labels of the materials are evident on the shelf.
- An educator is holding a child. The educator is looking at the child and her hand is on the child’s back. The child is crying.
- (Example when inferring) The child appears to be ringing the bell for a transition.
- Include specific details:
- Emotions (happy, smiling, crying, sad, frustrated, worried, pensive) gestures (Sshhh, wave, clap, point)
- Specific learning materials (trikes, magnifying glass, tablet, instruments)
- Area of classroom (block area, hallway, sink, etc.)
- Adaptive learning/participation tools (Tablet, wheelchair, fidgets)
- Curriculum practice if known (Creative Curriculum, Second Step, etc.)
